
In my last post about Jacobean crewelwork basics and the RSN brief, I laid the foundation for this project. Now it’s time to dive into the really exciting part: making design decisions, choosing stitches, and beginning the stitching journey itself.
My Design Decisions
When planning a Jacobean crewelwork piece, there are two big choices to make: which stitches to use and which colours to combine.
I wanted a balance between familiar ground and new territory. Some stitches I already knew and felt comfortable with; others were deliberately chosen to challenge me and broaden my stitch vocabulary.
Colour choices were equally important. Initially, I imagined using quite a lot of yellow, but my tutors wisely advised me to keep it as a true accent instead of a dominant colour. The compromise was to sprinkle the yellow throughout the piece, so it still tied everything together without overwhelming the design.
In the end, I selected three main colour groups:
- Grey — full shading range (light, medium, dark)
- Purple — full shading range
- Yellow — limited tones, purely as accent
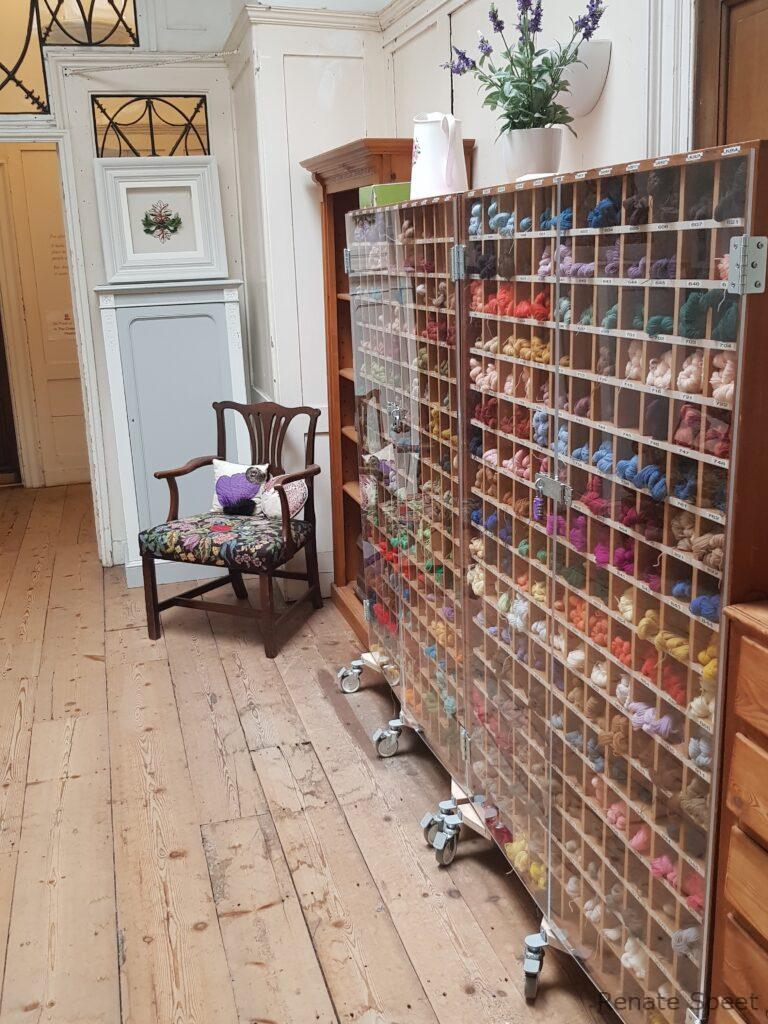
One of my favourite moments was standing in front of RSN’s colour wall — all those little cubbyholes filled with the complete range of Appleton’s wool. A stitcher’s dream, but also a challenge when it comes to narrowing down the options!
The Stitching Experience
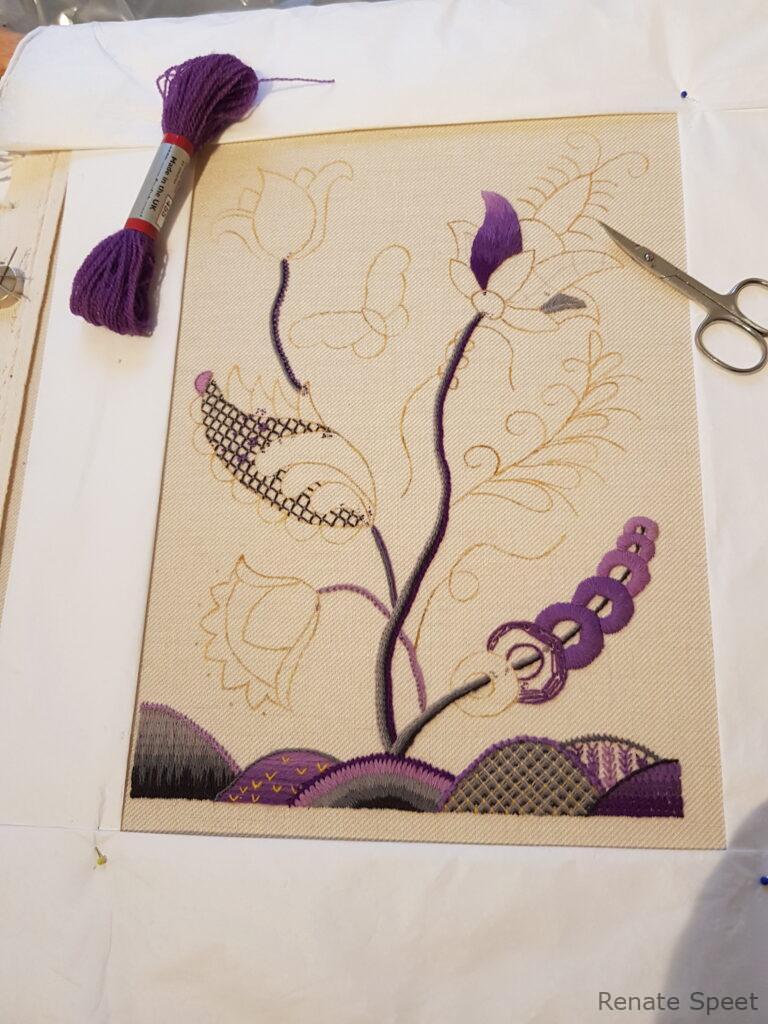
Once the design was transferred onto the linen twill, the real work began. This step was nerve-racking — painting the design outline onto fabric felt like a point of no return!
Each motif introduced me to new stitches and textures:
- Long-and-short shading for petals and leaves
- Trellis work for decorative texture
- Laid-and-couched stitches to cover broader areas
- Whipped tendrils for those fine curling lines
I generally worked from back to front, layering elements in the order they would appear naturally. That wasn’t always obvious from the design itself, but it helped me keep depth and perspective consistent.
To keep shading consistent, I stitched similar grey leaves in the same session, remembering how I had blended colours before. Smaller leaves sometimes omitted the darkest grey to avoid looking too heavy. For the tendrils, I had to whip them as I stitched, since there was no space to do it later between other motifs.
Some sections flowed beautifully — the stitches felt natural, and the needle seemed to glide. Others were far more challenging, requiring frequent unpicking. Let’s just say my seam ripper became an indispensable companion during this project.
What Went Well
This was my first time working with wool threads, and I was pleasantly surprised by how quickly they fill a space. The texture of the wool gives crewelwork such a tactile, dimensional quality.
Since I already knew several of the stitches, progress felt encouragingly quick. Perhaps too quick at times — I sometimes had to remind myself to slow down and check my work instead of racing ahead.
What I Would Do Differently
Looking back, I might rethink my colour palette. The grey and purple combination didn’t always sing together as much as I had hoped. If I could redo this, I would spend more time sampling different shades and pairings before committing.
Another lesson was thread quality. Appleton’s wool has its charm — the texture is part of the crewelwork tradition — but it isn’t always consistent. Some strands were thick, others thin, and fraying was common. If I were to repeat this, I would pay closer attention while stitching, setting aside any threads that didn’t handle well instead of trying to push through.
Slotgedachte
Despite the challenges, this Jacobean crewelwork project has been a wonderful learning experience. The blend of new stitches, bold colours, and traditional wool threads pushed me out of my comfort zone in all the right ways.
Next time, I’ll share how I approached the finishing and mounting of the piece as well as the final evaluation.