
This time, we’re taking a closer peek at the Malachite embroidery pattern by Trish Burr — one of her Intermediate-level bird designs that caught my eye (and then my stitching needle).
If you’ve never explored Trish’s work before, be warned: she offers an impressive variety of stitch guides and patterns. They range from beginner-friendly designs to complex, colour-rich creations. I’m especially fond of her bird series, as well as her Whitework with Colour designs. Honestly, if time weren’t so limited, I’d probably attempt them all!
One thing you’ll notice when browsing her shop is that she categorises each pattern by skill level — beginner, intermediate, or expert.
Why I Picked Malachite
Several years ago, I stitched a few of Trish’s beginner and other intermediate designs (link here to those past projects), so I felt confident enough to choose Malachite.
At first glance, the stitch guide for Malachite looked fairly similar to her simpler designs in terms of structure and layout. But — as I quickly discovered — it hides some sneaky complexity in those layers of feathers and fine colour transitions.
Scaling Up for Precision
Before starting, I decided to enlarge the entire design to about 120%. Some areas — the eyes in particular — were extremely small, and I wanted just a bit more breathing room to work the details.
This is one of those small adjustments that can make stitching more comfortable, especially if you’re dealing with fine detail or if your eyesight appreciates a little extra kindness.
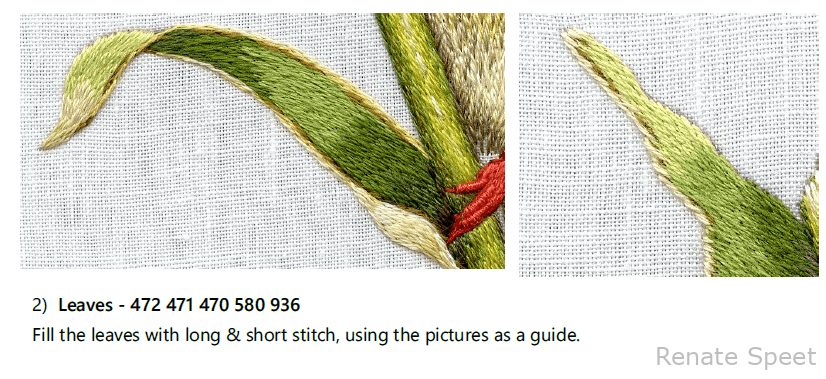
Leaves and Colour Placement
The leaves were one of the first sections I tackled. The instructions were clear enough in a general sense, but the exact placement of colours was left open to interpretation. While the guide listed the shades, the finer details — exactly where each one should go — were up to me.
For an experienced stitcher, that freedom is delightful. For a beginner? Possibly daunting.
Working the Bird Itself – Order of Work
At the Royal School of Needlework, I was taught that the order of stitching is crucial for achieving realism. Typically, you work from the back of the design forward, so each stitch naturally overlaps the one behind it—after all, you can’t stitch under a previous stitch.
Trish’s Malachite instructions, however, sometimes suggest stitching elements at the front before those in the back. This may make the guide more approachable for a wider audience, but in my view, it misses an opportunity to reinforce finer realism techniques. Some of Trish’s other patterns, such as the Lilac-breasted Roller, also follow this back-to-front approach. See below snap shot from the pattern that clearly builds up from the bottom upwards.
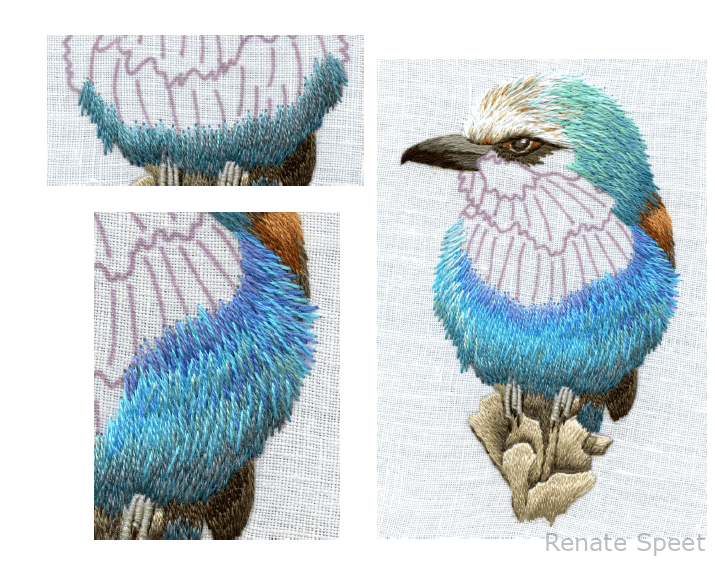
Traditionally (at least in fur or feather work), I would expect to work from the back of the design forward, so that each stitch overlaps naturally, following the direction in which the feathers or fur grow.
This difference may be linked to her irregular long and short stitch, which she developed to better mimic the look of natural fur and feathers.
In my case, I chose to work the bird from the bottom upward, still applying her irregular stitch technique, but ensuring that each “feather” lay over the one beneath it.
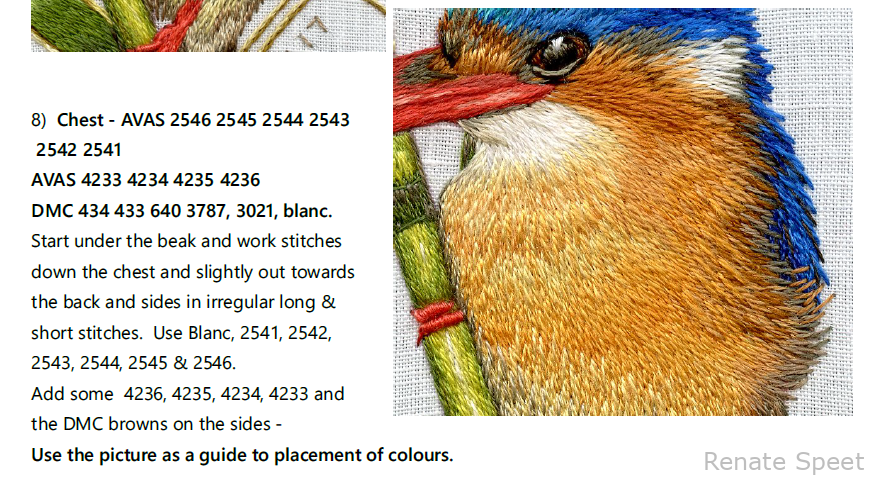
The Chest: Where Theory Meets Reality
When I reached the chest area, the pattern called for about 10 different tones of yellow, beige, and grey to be used interchangeably. The tones were very close together, which made them tricky to distinguish in the printed stitch guide.
From the photo, I could only reliably identify the lightest and darkest shades — the rest required a lot of interpretation and blending to achieve the soft, realistic effect of the original image. This is not the sort of section a beginner would feel comfortable with… and honestly, even an intermediate stitcher might find it challenging.
Final Thoughts
After working through the pattern, I can clearly see why Malachite is rated at the intermediate level. It demands careful colour judgment, a solid grasp of feather layering, and the confidence to make creative decisions without step-by-step handholding.
And yet — that’s part of the fun.