
This week’s online class was all about appliqué embroidery techniques —refining past work, testing new approaches, and untangling a few mysteries that had lingered from last time. Bit by bit, the project is coming alive.
After the previous session, I left with a list of “homework” tasks to experiment with.
The two main items were:
- Practising fabric application (a foundational skill for almost everything in appliqué).
- Sampling the “stitch and stuff” method, which I plan to use for the cat.
Applying Fabric
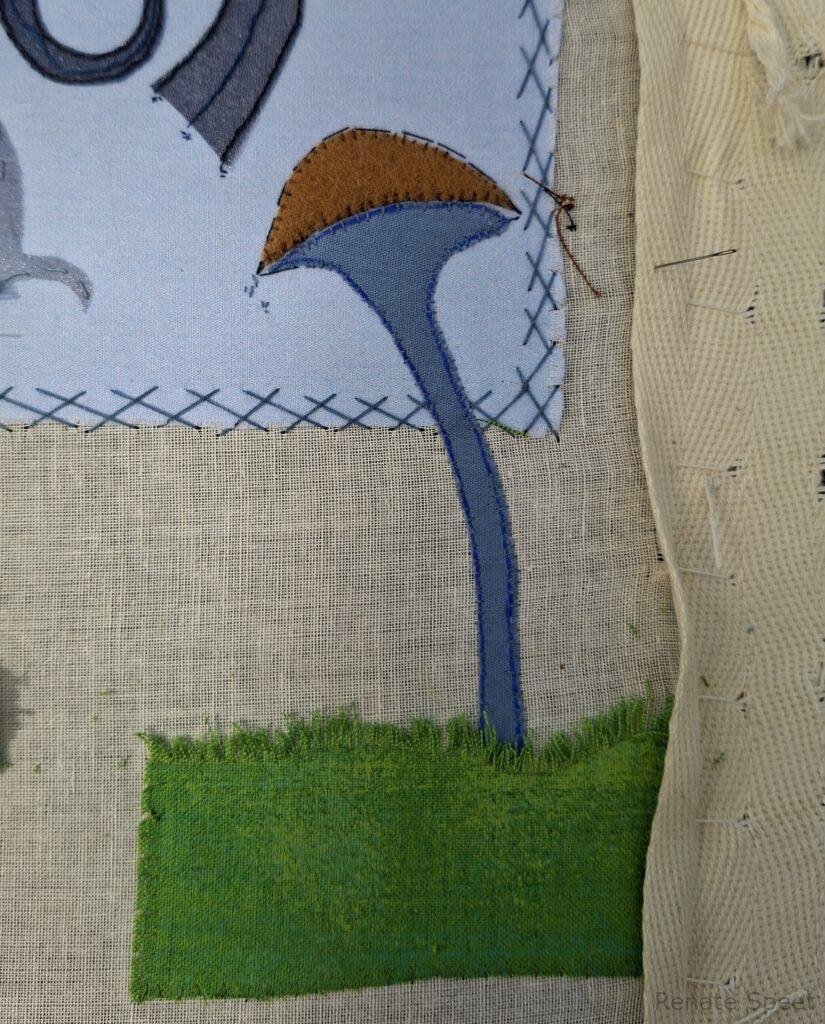
This part came with more challenges than expected (more detail in my earlier post here). I even ended up emailing my tutor with a string of questions! To test approaches, I worked two mushroom samples side by side:
- Sample 1 – Tall, skinny mushroom
Painted over the pounce, glued outside the paint line, then cut out. The result? The fabric extended beyond the design lines. My tutor reassured me that this is common and can be covered later with dense stitches such as couching, cording, buttonhole, or satin. - Sample 2 – Short mushroom
Painted just inside the pounce, glued (with water mix) directly over the design lines, then cut out. This gave me a more accurate shape, but some paint still showed even after edging with 6 DMC strands. My tutor warned me this method risks glue showing, especially on delicate fabrics like silk.
In the end, after more discussion in class, I decided to stabilise fabrics with Wonderweb, and then stitch them to the background fabric by hand.
- Important reminder: don’t iron it onto the main piece (it risks melting organza again!).
- Stitch appliqué onto a medium-tight frame, using a closed buttonhole to cover edges.
- And yes… don’t forget to peel the paper from the back of the Wonderweb first! (I’ve done that twice now).
With this method sorted, I can now move forward and finish these marked mushrooms.

Grassy Hillocks
I had also sampled a frayed edging for a grass hillock, which we reviewed in class. My tutor liked it—even though I hadn’t exactly followed the “standard” approach (not that it’s even explained in the book…).
The plan is to work several hillocks in different shades of green, overlapping slightly to create depth. Initially, I thought I would have to alternate carefully between mushrooms and grass, but after reviewing with my tutor, I realised I can actually stitch in larger sections of grass right now. That’s great news—it means I’ve got plenty to keep me busy for homework.
Stitch and Stuff – The Cat
The last sample I worked on was the stitch and stuff method for the cat.
In my previous attempt (link), his forearm had turned out far too plump, as the fluff pushed out beyond the design lines. This time I drew a new inner outline—effectively his “skin”—to leave space for fluff and volume without the whole cat becoming overweight!
The plan: cover this outline with felt, then add toy stuffing as I stitch, shaping the form in 3D. I’d started a small sample before class, and already the arm looked quite muscular.
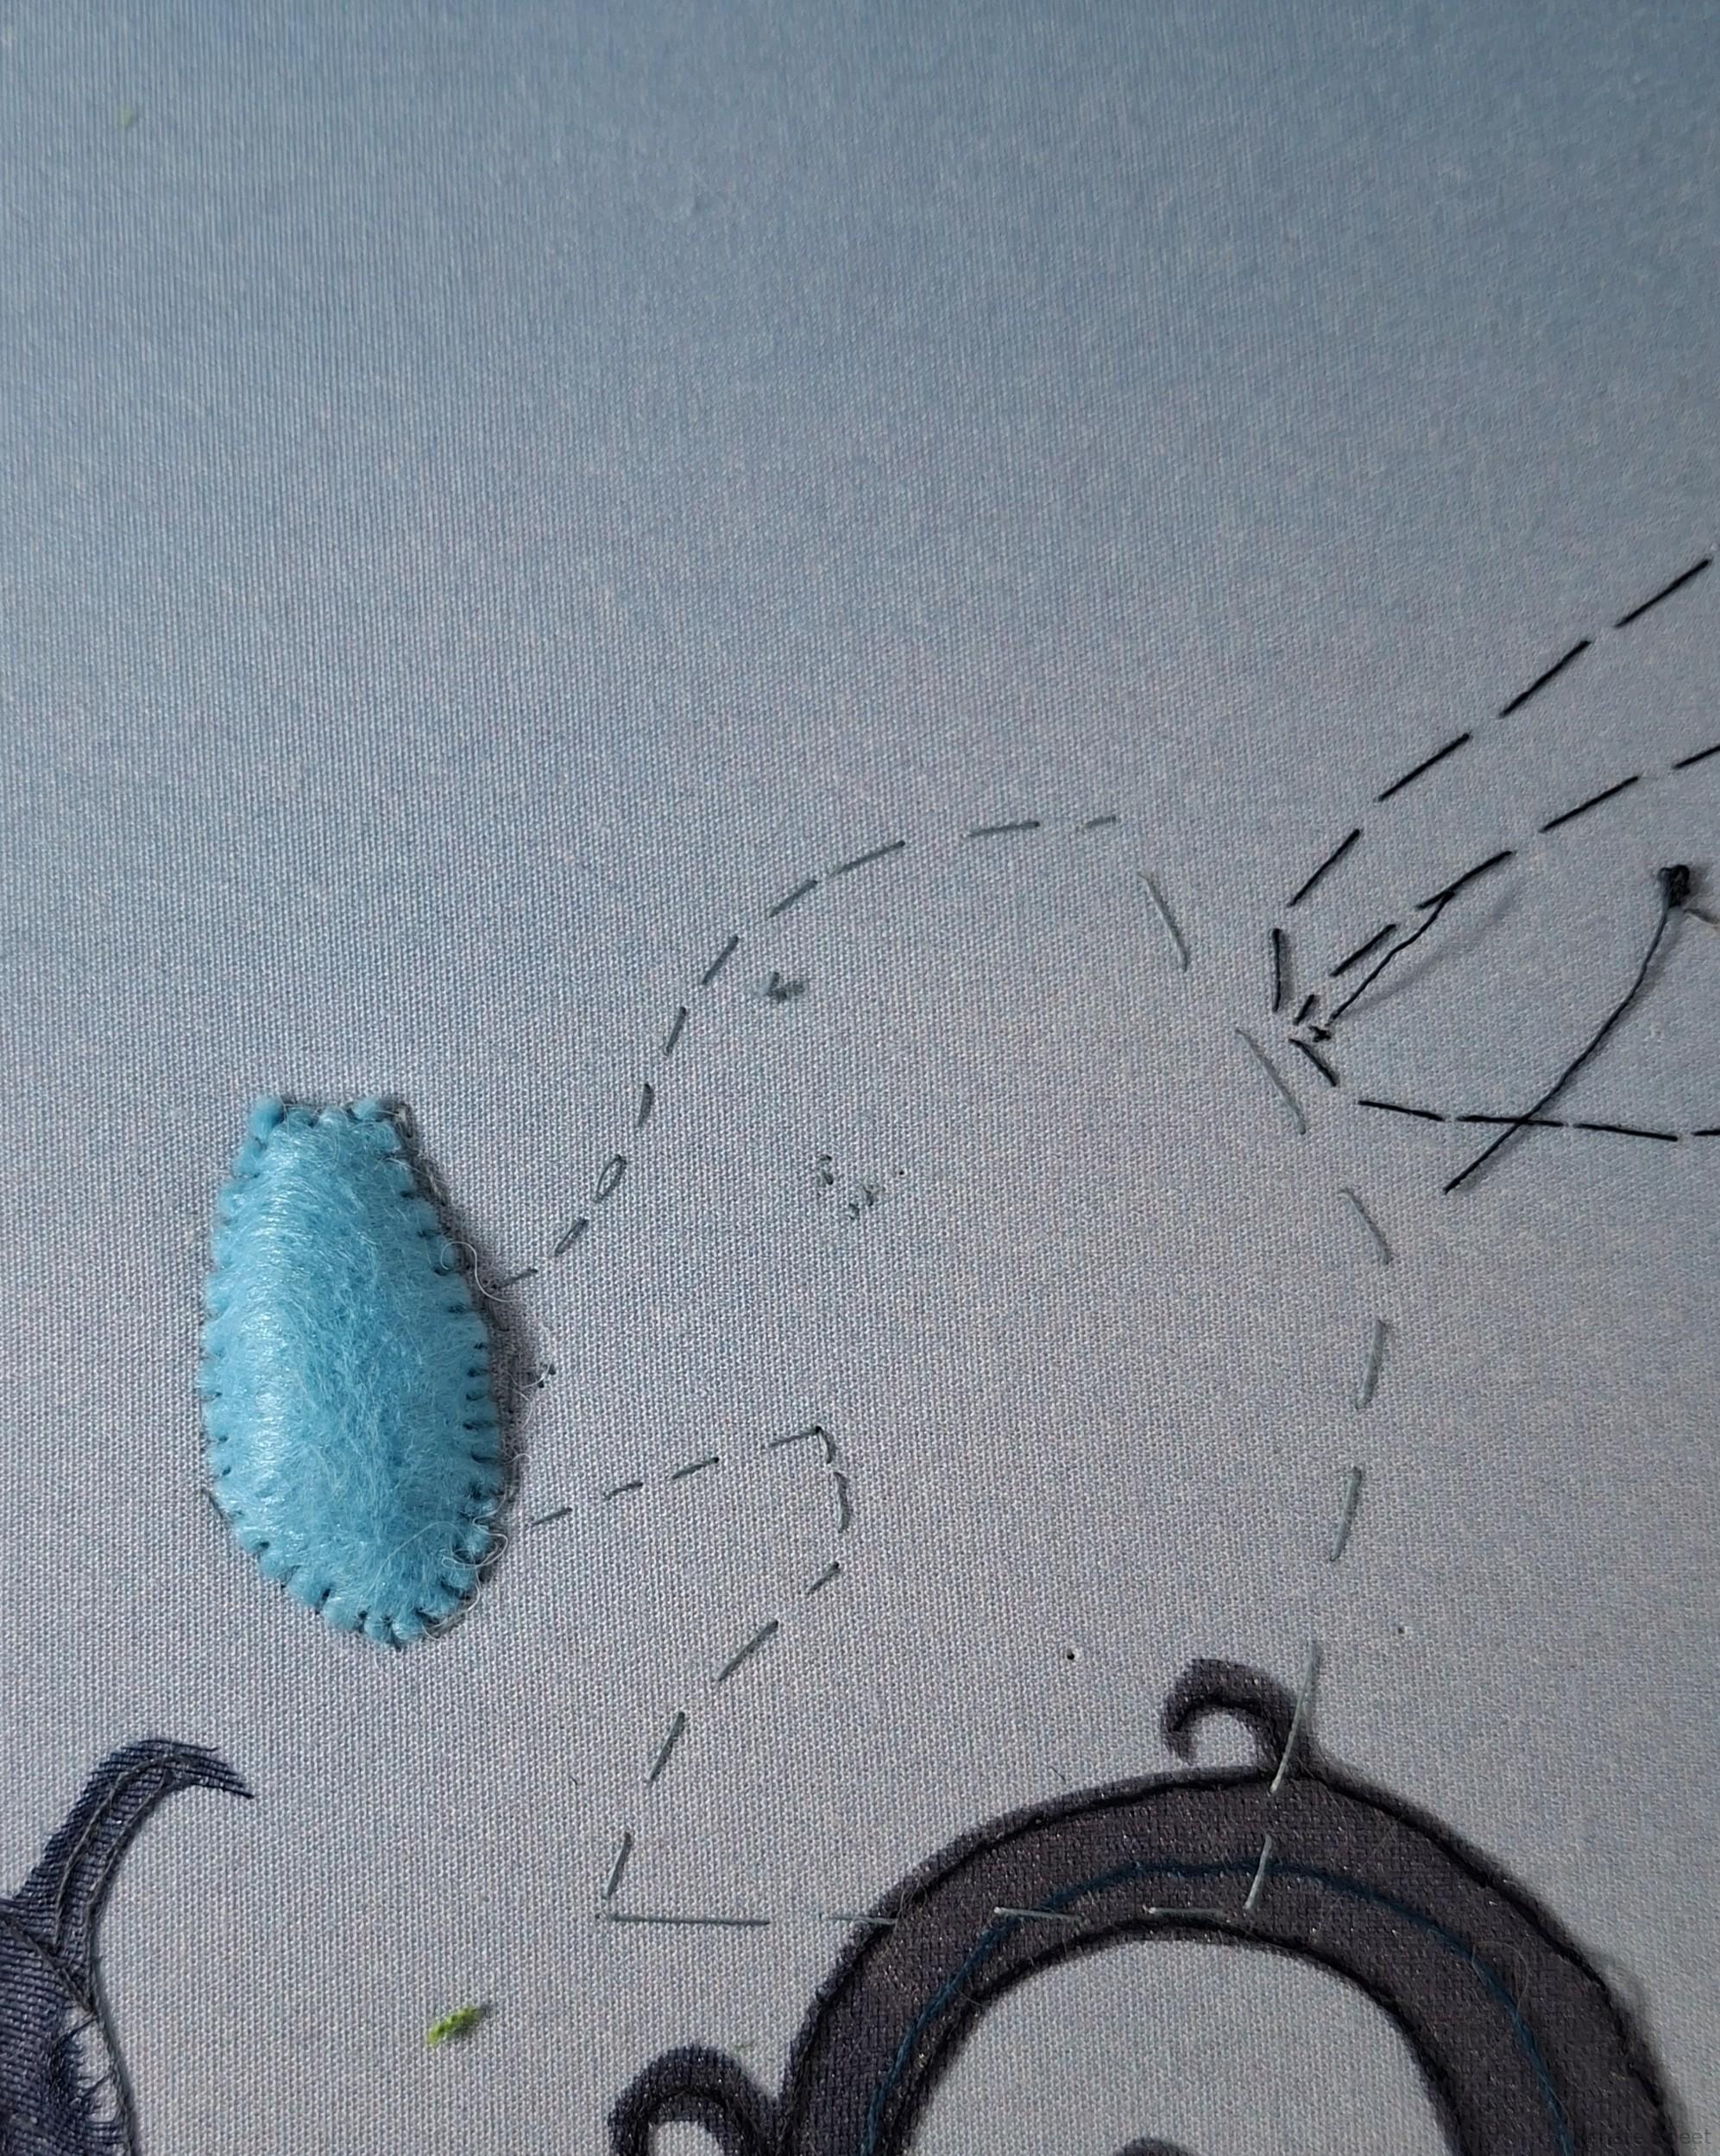
During class, we discussed how the shapes should connect. I had imagined working each body part separately, but my tutor suggested it might be better to stitch the main body as one single piece, then add limbs and details. That’s more homework for me—to test this new approach and see how it works in practice.
Key Takeaways
This week felt like a turning point: several elements are now refined enough to move into the real piece, instead of endless sampling. That’s exciting, but it also means some concentrated stitching time ahead if I want to finish before the next class.
Speaking of which—my next session will be at the end of September. This time, it’s in person at Hampton Court for a two-day class. I’m really looking forward to it, though I still need to figure out the logistics of getting my oversized frame there (definitely not cabin-luggage friendly!).