
After completing the Certificate in Technical Hand Embroidery at the Royal School of Needlework, I’ve officially started the first class of the Diploma programme: Appliqué embroidery at RSN. Unlike previous modules, this one brings a new kind of challenge—blending illustration, texture, and three-dimensional construction in fascinating ways.
What Is Appliqué Embroidery?
Appliqué is a traditional embroidery technique where fabric shapes are cut, layered, and stitched onto a base fabric to create images, textures, or decorative patterns. It can be worked in flat layers or built up using padding and contrasting materials to add depth and dimension.
Because of its versatility, appliqué has long been used in both historic textile arts and contemporary embroidery. In particular, it’s perfect for telling visual stories—bringing characters, scenes, and ideas to life through fabric.
My Appliqué Project: The Cheshire Cat in Fabric
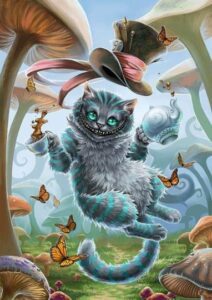
For my diploma appliqué project, I chose to interpret the Cheshire Cat—a whimsical and mischievous figure from Alice in Wonderland. This character gives me the perfect opportunity to explore varied textures, raised shapes, and layering techniques.
The design includes:
- Mushrooms in different shapes and sizes
- Twisting thorn bushes and floating butterflies
- The famous grin of the Cheshire Cat
- A teacup, teapot, and the Mad Hatter’s hat
Each component presents a new technical challenge. In fact, I plan to use different appliqué embroidery methods to simulate dimension and build a vivid, story-driven textile scene.
Techniques I’m Learning in This Module
This appliqué module at the Royal School of Needlework introduces a wide range of advanced hand embroidery skills. So far, I’m learning to:
- Work with flat and raised appliqué methods
- Build padding using felt and string
- Finish and decorate edges with a variety of stitches
- Combine diverse fabrics and textures in one cohesive design
- Create depth and contrast through thoughtful layering techniques
As I move through the course, I’ll apply each of these skills directly to my Cheshire Cat composition.
Getting Started: From Digital Design to Fabric
Before anything else, I needed to decide which elements of the design to keep. Then, I prepared a master tracing to guide the layout and proportions.
To retain the subtle color gradients in the background, I digitally painted the full scene. After that, I had the background image professionally printed onto fabric.
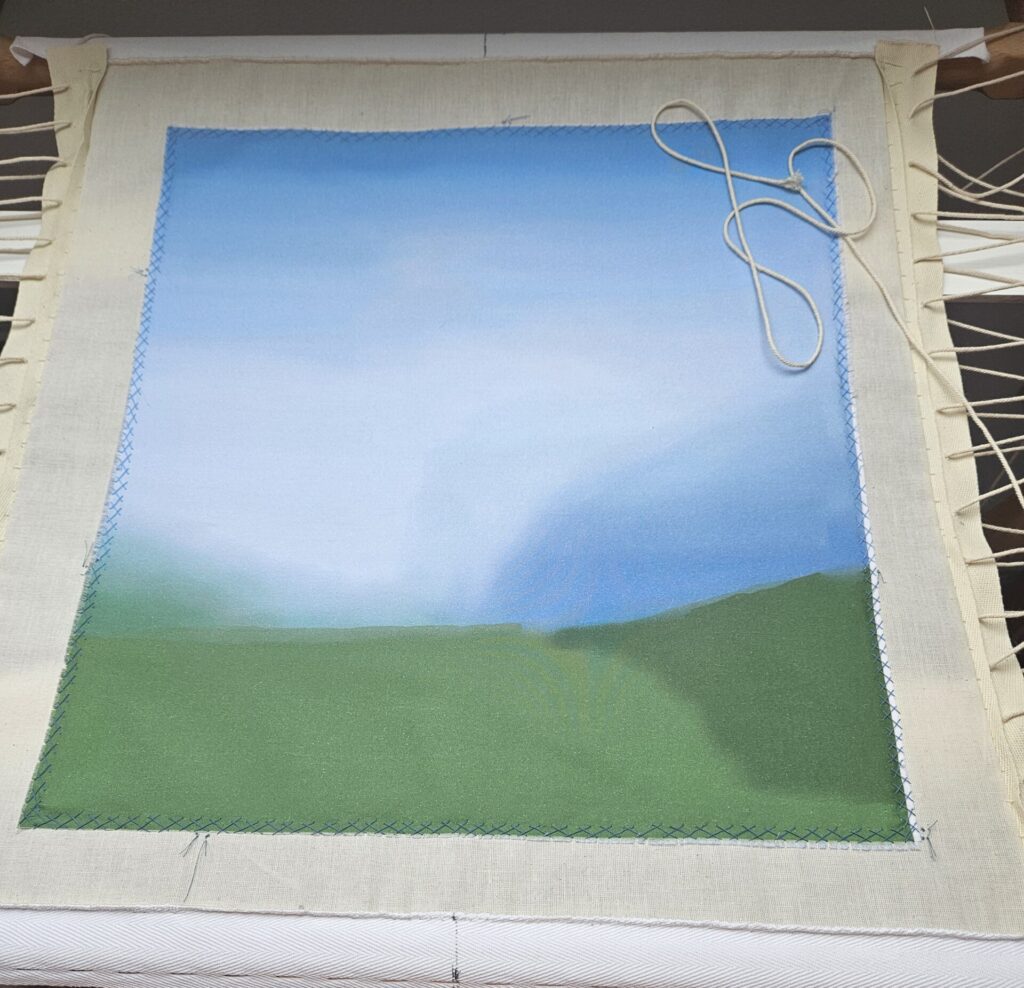
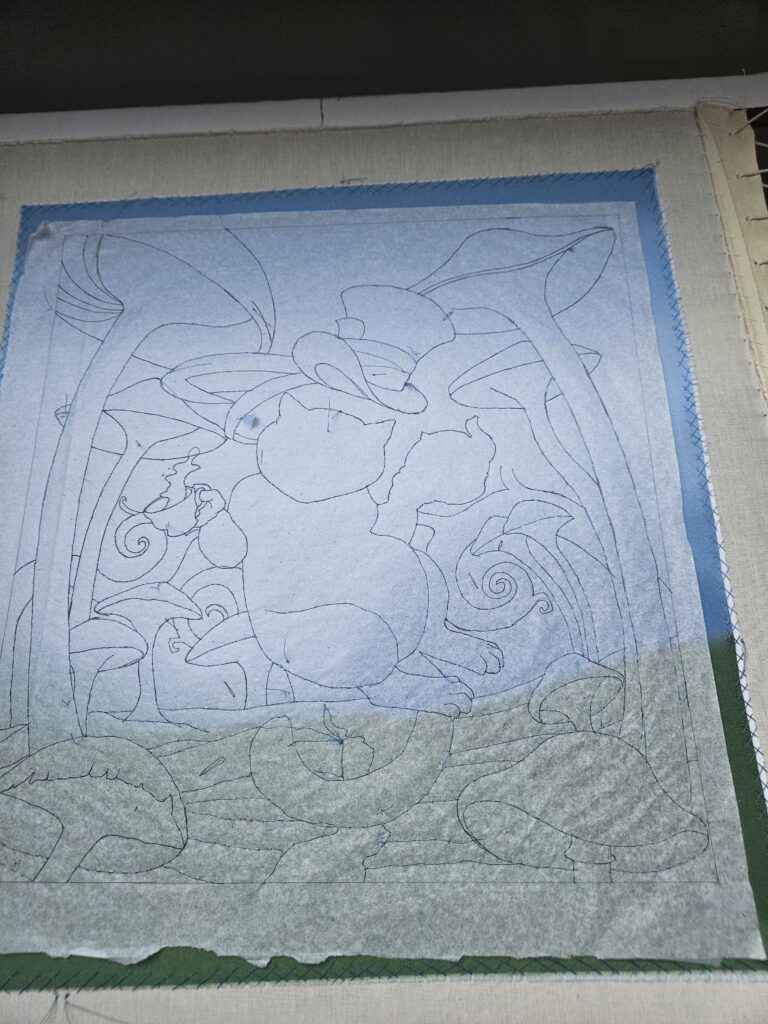
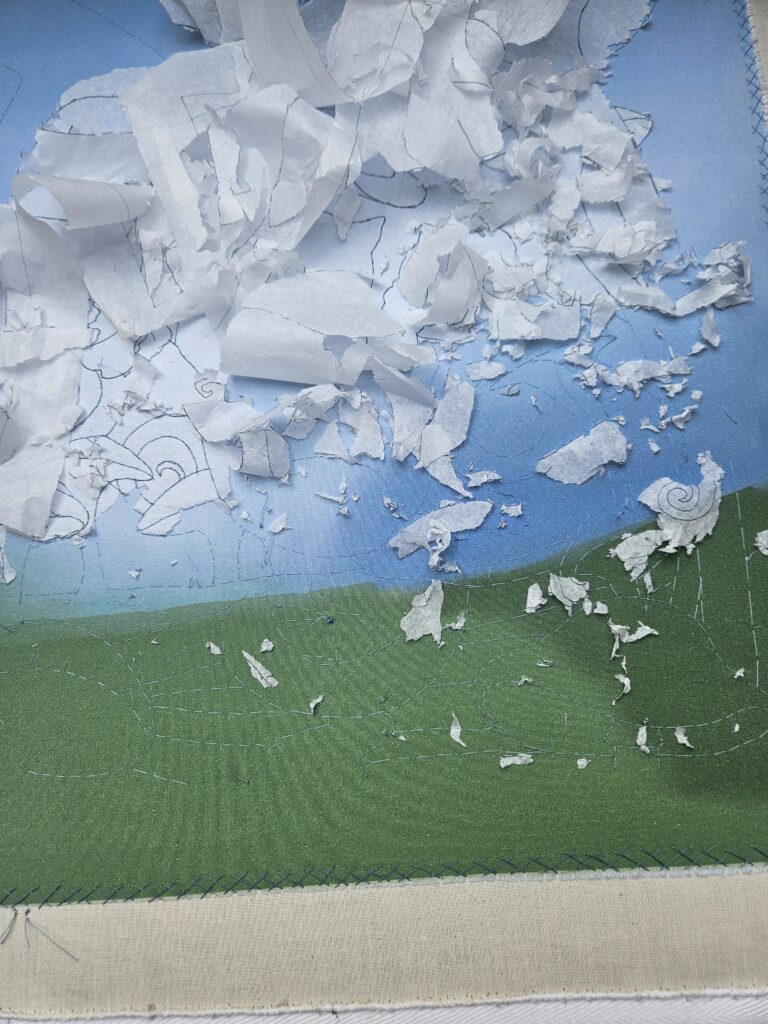
Once the printed fabric arrived, I mounted it onto a frame. Then, I traced the design lines onto tissue paper and stitched over them with a running stitch to transfer the image. Finally, I pulled away the paper—messy but satisfying!
What’s Next in My Appliqué Journey?
It’s still early in the process, but I’m excited to keep learning. Each layer adds new complexity, and each stitch brings me closer to the finished scene.
Appliqué feels like storytelling in fabric—one shape at a time. With every added detail, the Cheshire Cat becomes more alive. I can’t wait to see where this project takes me next.